
1. Draw a single loop that connects the dots on the grid.
2. The loop may only travel horizontally and vertically, not diagonally (so all turns are right angles).
3. The loop may only turn at the dots.
4. The loop may not cross itself or branch off.
5. All numbers inside the grid indicate how many sides around it are in the loop.
Ah, Slitherlink. Also known (by just me, made just now) as "theorem city". Because there are a LOT of theorems in Slitherlink, they'll be numbered as "1.2" and such, with the first number saying what type of given it's about.
If you haven't read it yet, read the loop tips.
Only thing I'll mention other than theorems: this puzzle was MADE for x's. Use them extensively. Also, realize that a zero just makes four x's.
Theorem 0.1: If a number has x's around it such that there are as many open spots as the number itself, there are lines in the open spots.
This is Theorem 0.1 because it's important and involves all numbers (Theorem 0.2 is the same).
Consider this puzzle:

These zeros make these x's:

And so, by Theorem 0, that 1 gets this line:

Using the other theorems for loop puzzles would make this this:

...making this a sad puzzle indeed.
A special case of this theorem is with a zero and a three:
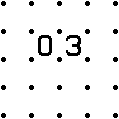
Using x's, this theorem, and other theorems, this finally becomes this:

Any time you see a zero and three next to each other, you can write all of this. It's fairly common to see, too, and is an easy way to get started.
Theorem 0.2: If a number has as many lines as the number is, all other sides of the number are x's.
This one is pretty self-explanatory (and makes sense). Think of if there was a one here as well in the last example:

By this theorem, we can write x's here as well:

These next theorems are better stated with pictures than words. I'll just say them all here. When using them, remember that they can be rotated, mirrored, and all of that and still be used. I won't prove any of them to save space. If you want, you can try to see why they are. Some of them are really weird.
Theorem 1.1: If  then
then
then
Theorem 1.2: If then
then
then
Theorem 2.1: If then
then or
or
thenor
Theorem 2.2: If then
then
then
Theorem 3.1: If then
then
then
Theorem 3.2: If then
then
then
Theorem 3.3: If then
then
then
Theorem 3.4: If then
then
then
Now, I realize that just stating seven eight theorems and walking away may not be the best thing, so I'll try to design a short puzzle that uses all of these theorems. (Theorem 2.2 was added later, so the example doesn't use it. Sorry.)
...
Done!

Ah, a nice, small, non-symmetrical (eep!) slitherlink...
So! First, I will apply Theorem 3.3:

Now Theorem 3.4:

Now, think of Theorem 2.1 on the top left. It works because the walls act like x's. The lines could either be on the left and top side of the two, or on the right and bottom side of the two. Either way, they need to leave the two like this:

Now, Theorem 0.2:

The Theorem 2.1 case of it being on the right and bottom of the two are gone. It must be the top and left:

(note that I made a couple more x's using other theorems. I'll do this sometimes and not mention it because it's simple enough.)
Now, by Theorem 3.1:

This causes an x on the three below, making this:

Let's actually put x's around that zero, and another related x:

Now, by Theorem 3.1 again:

Let's extend this line on the left a bit:

This causes this:


Let's extend the top loop as well:

If these two loops touch each other, they'll make a closed loop. So, there's an x here:

Both of those parts of the loop can now get extended:


(you'll notice I didn't use a few x's here. It's obvious what's going on, so I didn't bother to make them.)
Now, these are still a part of the same loop, so this can actually be extended all the way down to here:

Now, let's draw this x in a totally different part I forgot to do earlier:

Now, by applying Theorem 1.2 twice:

Now Theorem 0.1 and extending the line:

Theorem 1.1:

We actually didn't need to use that theorem, but I needed to have an example. Now we'll just use theorem 0.1 again on that two and extend a couple lines:

Now use Theorem 3.2 on this three on the bottom:

This three has to do this or it will be stuck going to the left:

The bottom right is actually the same as the top left. I'll just put in what we figured out up there:

All of the x's aren't there, but it's obvious that the loop now has to do this:

Slitherlink is mostly about recognizing patterns and using the appropriate theorems. It's not always like that, but with the way it is most of the time that's how it ends up solving.
No comments:
Post a Comment